Crocheted Winter Headbands

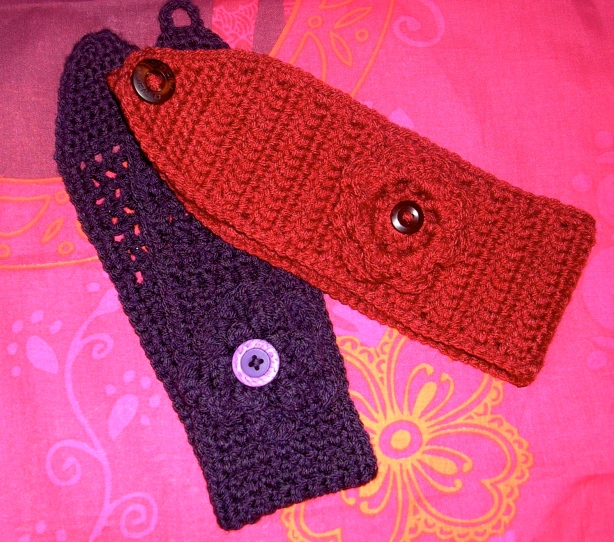
Two versions of the crocheted headband with flowers

So I’ve become a little bit obsessive compulsive about my latest creations. Headbands. Ear warmers. Fashionable head gear. OMG! The possibilities!

It started with this pin which links to Repeat Crafter Me. (http://www.repeatcrafterme.com/2011/12/crochet-winter-headband-with-flower.html) On her site, she shows the link to the pattern for the head band and the flower including her own variation on what she’s done with it.

I have taken my own twist on this and have created many of these cute things by starting and ending the same way, but allowing for variations on a pattern stitch to make up the headband. Then I’ve changed up the buttons, embellishments and flower accessories. I’ve even made up my own pattern for an amazing granny square winter headband that I’m completely in love with. Below details my take on the crocheted winter headband including a few of my versions of different pattern stitches. I’ll save the granny square headband for another post because I want to make more and perfect the pattern before posting it for FREE. Yeah, that’s how we roll!! Free patterns!

Here is the link to the original pattern for the headband. I’ve made a few from this pattern, but below I’ve included variations on the pattern stitch so that you can see that the options are endless and beautiful. There are some patterns that are thick and tight and some that have a lot of give and make the headband really stretchy and adaptable to all head sizes. Check out http://www.crochetme.com… it’s an amazing site with lots of patterns and info!

http://www.crochetme.com/media/p/90100.aspx

Crocheted Winter Headband

Using 4.0mm crochet hook
#4 worsted weight 100% acrylic yarn

Time: Takes me about 1.5 hours to complete a head band without an added embellishment.

No need to work on gauge because you are going to be able to adjust the size based on your head, but the patterns will all have different stretch to them depending on how tight or flexible you want your headband to be.

Beginning of head band:

Chain 4 sts
Row 1: sc in 2nd ch and across, ch 1, turn
Row 2: (2 sc) in 1st st, sc 1, (2 sc) in last ch, ch 1, turn
Row 3: sc across, ch 1, turn
Row 4: (2 sc) in 1st st, sc to next to last st, (2 sc) in last st, ch 1, turn

Repeat Rows 3 and 4 until you have 13 stitches then complete one row of sc across your 13 stitches, ch 1, turn. That completes the beginning piece of the headhand.
Next you can work on any pattern stitch that you like. You will want to work your pattern stitch until your headband reaches approximately 12 inches. It will feel really short when you measure it to your head, but when you do the finishing part it adds a few inches. Here are a few variations of pattern stitches to use.

This one here is the one from http://www.crochetme.com and seen in the example photo above from http://www.repeatcrafterme.com

Pattern Row: dc in first stitch, *skip 1 stitch, work (sc, dc) in next stitch; repeat from * until there are two stitches remaining. skip 1 stitch, sc in the turning chain of the previous row, ch 1, turn

Here are a few of my own creations.

Pattern Row Option 2: (*dc, ch 1, skip a st) repeat until last st and end the row with a dc in the last st, ch 1, turn. Repeat until you reach desired length.

Pattern Row Option 3: (*tc, dc) repeat across entire row, ch 1, turn. Repeat until you reach desired length.

Pattern Row Option 4: Row 1 – sc across, ch 2, turn. Row 2 – dc across, ch 1, turn. Repeat rows 1 and 2 until you reach desired length.

When you finish your pattern stitches, continue:

Row 1: sc across, ch 1, turn

Row 2: (begin decreases): Sc dec 2 st, sc to last 2 st, sc dec, ch 1, turn

Row 3: sc across, ch 1, turn

Repeat these Rows 2 and 3 until you have 3 stitches remaining. Now you are ready to do the sc border and ties.

Ch 1, sc around the headband. When you reach the 3 sc at each end, sc in 1st 2 stitches, then ch 7 – 9 and sl st to the final row of three sts at the base. Add another sl st for good measure, tie off and fasten loose ends.

Take a button or accessory of your choice and attach it to the opposite side of the head band. What you will have is a looped chain on one side and a button on the other. When the two sides come together the chain loops around your attached button securing your headband.

In some of my versions, I have created my own flowers or other embellishments to jazz up the design (oh geez… I said “jazz it up”. Am I 80 years old??? Well, I do like crocheting, tea and the Young & the Restless, so I’m sure my grandmother would be proud!)

Have fun with the pattern and check out the links to other sites on here. Leave your comments or send us pics of your versions of this quick project and we’ll post them!

Made beautifully by Leanne… 🙂
Crocheted Men’s Scarf

I searched the Internet far and wide to find a men’s crochet scarf pattern and turned up pretty empty handed. The consensus seems to be that crochet is not manly enough. Seeing as knitting is not my forte, I thought I was going to have to purchase a scarf and tell my boyfriend I made it myself. Which of course wouldn’t be true because 1. It’s actually finished and within a reasonable timeframe, and 2. It would be flawless.

Seeing as I’m embracing the spirit of honesty I decided I should figure it out. I tell my students that all the time, “figure it out.” I’m taking my own advice folks! I created my own pattern because I’m savvy like that. Aka, lazy because I only used two very basic stitches. Rest assured, anyone can make this scarf.

Stitches needed: chain, single crochet and slip stitch.

Yarn: “5 chunky” – 2.5 skeins

Hook: size 8

This is all very interpretative, so feel free to change the size or weight of your yarn and needle. It takes quite a bit of yarn, but it’s not difficult, just time consuming.

Chain 170. (Or until your desired length – most patterns recommended chain 300, but my boyfriend is short so I adjusted)

Row 1: single crochet in each stitch in chain across row, turn
Row 2: slip stitch in each stitch, turn

Repeat until desired width.

Mine ended up being 21 rows across.

When you’ve reached your desired length, slip stitch around all edges to create a finished look.

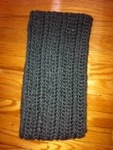
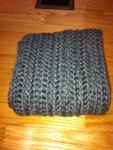
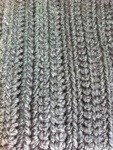
20121028-094519.jpg

20121028-094552.jpg

20121028-094612.jpg

I realized after that’s should have done two rows of slip stitch each time to create a more prominent difference in the rows. It looks good the way it is, but it would be more pronounced with 2 rows. Again, it’s preference.

I’d take a picture of him wearing it, but he has a hissy fit every time I ask him to take a photo. Which ill admit is often, but I like to photo document everything. Just in case. You know?!

Maybe ill sneak one when he’s not looking.

Now go and crochet your husbands, fiancés and boyfriends scarves. Hopefully you only have one and not all of the above, but no judgement here! 😉

sd. 😻

Owl Slippers {crochet}

Anyone that knows me knows I have an obsession with owls. I just love them! So when I started crocheting slippers, I knew I had to find a way to make a cute pair of owl slippers.

You will want to start by checking out my original post on Crochet Slippers, where you will find the link for the free pattern. Also make sure you take a look at “Important things to note on the Mary Jane pattern and changes I made” at the end of that post.

Just like with the sock monkey slippers, I made these using a size 5 crochet hook and worsted weight yarn. My feet are a size 8 or 9 and these fit nicely. For smaller than a size 7 foot I recommend using a size 4.5 or 4 hook. You don’t have to use the colours I did, get creative!

1. Crochet the “toe” and “sole” portion in orange.
2. Change to brown for the “upper” portion.
3. Eyes (make 4 in white)
R 1: Ch 2, 6 sc in second chain from hook.
R 2: 2 sc in each sc around. (12 sts)
Slip stitch to finish off, leave long tail for sewing.
With black yarn, tie a couple of knots in the same spot and thread through the centre of eye.
4. Wings (make 4 in brown)
Starting at bottom of wing, ch 2.
R 1: Sc in second ch. Ch 1, turn. (1 sc)
R 2: 2 sc in first sc. Ch 1, turn. (2 sc)
R 3: 2 sc in first sc, sc in next sc. Ch 1, turn. ( 3 sc)
R 4: 2 sc in first sc, sc in next 2 sc. Ch 1, turn.(4 sc)
R 5:  2 sc in first sc, sc in next 3 sc. Ch 1. (5 sc)
Sc down the 2 “V” sides of the wing, increasing at the bottom of the “V” with an extra chain. Finish off with a slip stitch, leave long tail for sewing. (Sc-ing down the 2 sides gives it a finished edge and looks much nicer.)
5. Beak (make 2 in beige)
Make exactly the same as the wings, stopping at R 3.
6. Using blunt needle, sew on all pieces to make the owl. For the wings I only sewed along the top, leaving the bottom free for “flapping” 🙂 haha

These slippers are the most involved ones I have made to date. I really love them though. The most tedious part is sewing on all the pieces that make the owl. But it’s totally worth it. Have fun with it! Change up the colours. I definitely plan on making more. Happy crocheting friends!

~Made beautifully by Heather~

Sock Monkey Slippers {crochet}

I apologize for the delay in getting this posted. I would have included it in the Crochet Slipper post but it was already so long. Plus these are unique and I thought they deserved their own post.

So here we go…

You will want to start by checking out my original post on Crochet Slippers, where you will find the link for the free pattern. Also make sure you take a look at “Important things to note on the Mary Jane pattern and changes I made” at the end of that post.

I used a size 5 hook and a worsted weight yarn. My feet are a size 8 or 9 depending and they fit my feet comfy. These would easily still fit a smaller foot (size 7), they just may need to wear socks. For really small feet, size 4- 6, use a size 4 hook.

1. Crochet the first 4 rows in red for the mouth.
2. Change to a cream or white yarn for the next 3 rows. NOTE: According to the pattern there are only 6 rows for the “toe” but I added an extra row – row 7 – for the nose part of the  monkey. Just do one more row of 24 stitches.
3. Switch to the brown for the rest of slipper and crochet according to the pattern. I stopped after row 7 of the upper portion.
4. Ears (make 4, using brown yarn)
R1: Ch 2, 5 sc in second chain from hook.
R2: 2 sc in each sc around. (10 sts)
R3 and 4: sc 10
Fasten off, leaving long tail for sewing.
5. Eyes (make 4, using black yarn)
Ch 2, 5 sc in second chain from hook.
Fasten off, leaving long tail for sewing.
6. Using a blunt needle, sew on eyes and ears.
7. Stitch on nose and mouth with black yarn and the blunt needle.

And that’s it! They are a little more involved than other slippers but for any sock monkey lover, it’s totally worth it! Happy crocheting!

~Made beautifully by Heather~

Crochet Slippers

Back at the end of July I went on short term disability from work for a procedure I had done on my toes. I was off for 3 weeks and wasn’t able to walk much so I had alot of time to sit on my butt and crochet! I had struggled to find a project that inspired me, until I came across this pattern for slippers.

free-pattern-for-mary-jane-slippers

The pattern is for Mary Jane’s but I modified the pattern according to what I wanted to make. The base of the slipper pattern is perfect. Then I came up with individual patterns for each slipper design I had in mind. I made 8 pairs of slippers in just over 2 weeks. When crocheting the slippers please see my note on “important things to note” at the end of this post.

As you can see I haven’t actually made a pair of Mary Jane’s yet! I was having more fun coming up with my own ideas. For some of them I used ballet flats as my inspiration. And a few were inspired by this blogger…All About Ami – Slippers2. The slippers with the bows were inspired by hers, as well as the ones with 3 buttons. Please follow her instructions on how to make the bow! Her tutorial is so good I’m not even going to try to re-create it. (I am jealous of how good All About Ami’s photos are. My iPhone photos are no comparison!) For the 3 buttons pair, I did the toes and sole in a denim colour. It looks purple in the photo but its more of a dark blue denim. Then I switched to the light purple colour for the “upper” part of the slipper. And sewed on the buttons at the end.

I followed the same idea for my green slippers….I made the rectangle piece, (just like I did for the bow) then did a trim in the light green colour. I didn’t do the trim all the way around…top, bottom and one side. Then stitched it onto the slipper, each rectangle piece opposite on the other slipper – so that it was back to back when you wear them. Hope that makes sense. Then I sewed on the white buttons. My idea with these slippers was for it to look like ballet flats…where the button is, there would be a buckle on a shoe.

The flower slippers were really simple. For the last two rows (6 & 7) on the “upper” part of the slipper I switched to the green colour. Then for the flowers I followed this pattern: crochet flower. My “running shoe” slippers are done similarly to the 3 button ones….the toes and sole are done a dark purple, then I switched to the yellow for the upper portion. I cut a long piece of white yarn to use as my “laces,” sewed them on to the slippers and tied a bow at the end. I really love these ones – so simple but so cute! And for the scalloped edge ones I crocheted until row 5 of the upper portion of the slipper and switched to the light pink for the scallop. The edge is my own pattern:
1. Join alternate colour at the heel of the slipper.
2. Slip stitch in first 2 stitches {sc, dc, sc all in next stitch, slip stitch in next 2 stitches} repeat all the way around. Super easy!

The patterns for the owl slippers and sock monkey slippers are more involved, so I am going to post those patterns separately. Both of them still follow the base pattern from the Mary Jane’s. Stay tuned for those posts!

Let me know which slippers are your favourite! I change my mind everyday. I’m curious to hear what everyone else thinks. 🙂
Happy crocheting! ~H.

Important things to note on the Mary Jane pattern and changes I made:

  • I discovered a mistake that was made when the owner wrote the pattern: when crocheting the “upper” portion of the slipper, on row one she says there is 17 stitches on the toe-cap. This is wrong. There are 16 stitches. I know its not a big deal….only one stitch. But for me it is easier when I know I am counting the stitches correctly. So this means that for the toe cap on round 3 it is 12 stitches, round 4 is 10 stitches, round 5 is 8 stitches and round 6 it is 6 stitches. Like I said, I know its not a huge deal but it works out better when you can count the stitches properly.
  • Crochet the pattern in Single Crochet (sc) – American English. In the pattern she calls for a double crochet (dc) – this is in British English. I cannot stress enough how important it is to remember to make this in SC – on my first pair I started in American DC and quickly realized something was wrong. I didn’t make that mistake again!
  • Little House by the Sea says to mark your stitches at certain points – I didn’t do this. I made sure I counted my stitches and I didn’t have any trouble. I used a bobby pin to mark the beginning and end of a row so that if I lost count I could back track and check. But thats it. I didn’t see the need for using a contrasting colour yarn to mark where she did. But everyone is different!
  • I crocheted the slippers with a worsted weight yarn and a size 4 or 5 hook. I alternated to see what size slipper I would get. My feet are a size 8 or 9 depending…I found the slippers I made with the size 5 hook are better for me. The pattern says it fits US size 6.5-9. I think this is a bit of a stretch. My feet are very slim and the size 5 hook is good for me. A 5.5 hook might be even better. The slippers I made with the size 4 hook would be good for someone with a size 6 or 7 foot. For a few of the slippers (scalloped and 3 buttons) I used a bulky yarn – 5 strand weight and found that they were a bit sturdier then the worsted weight.
  • In the pattern where she calls for a decrease I used the invisible decrease as suggested by “All About Ami”: All About Ami – Slippers1, her tutorial on invisible decrease can be found here: invisible decrease. I highly recommend using the invisible decrease, it makes for a much smoother look.
  • And lastly, for the slippers that have an edging in a different colour, I crocheted up to row 5 and then switched to an alternate colour for row 6 and 7.