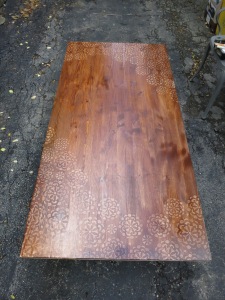
This DIY was a labour of love for about 3 months! When I moved into my new place I couldn’t take my old desk because it was too big. I had seen a post on Pinterest – Paisley Stenciled Table – that I had fallen in love with and knew I wanted to find a way to make it happen for my new desk. There was some trial and error with it but in the end I love how it turned out. I looked into buying a similar stencil but they are pricey! So I found another way to make it happen. I own a Cricut, so I started looking through my cartridges to see if I had anything suitable to use for a stencil. I found a cute “doily” like cutout that I thought would work. Below is my final product. I love it! It was a lot of work but totally worth it!
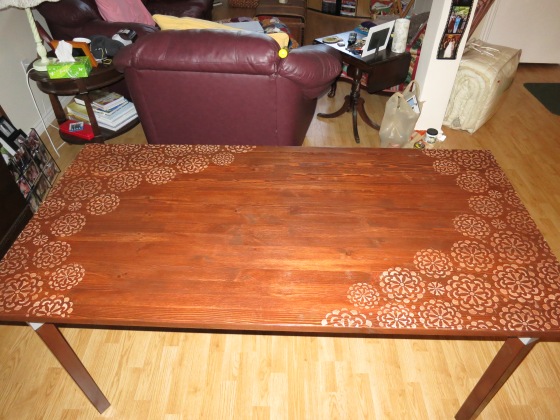
I chose not to do an all over pattern on the table because I thought it would be too overwhelming with the small stencils I was using. Here are the steps and materials involved:
Materials Needed:
– a table (I bought a pine table top and legs from Ikea. I had looked into getting a table second hand but couldn’t find one that would work for this DIY.)
– white paint (I didn’t need very much so I bought a Behr interior/exterior paint sample size at Home Depot)
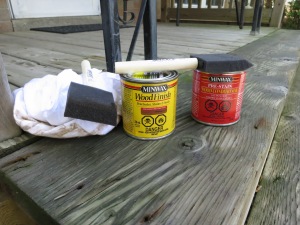
– pre-stain treatment for the wood
– wood stain in the colour of your choice
– foam brushes (1 and 2 inch sizes)
– cotton cloth
– sand paper and sander
Step 1
You will need to start by sanding the table and legs. At first I had thought I could sand it by hand, I quickly realized that would take FOREVER, so I moved to plan b. I borrowed an electric sander from my grandfather and also got some help from Leanne with her heavy duty sander! Its important to have a smooth surface when you apply the stain. Don’t forget to sand the legs as well. (I didn’t and learned the hard way that I should have.)
Step 2
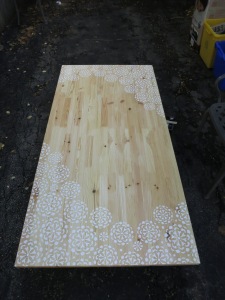
Cut out your stencils. I knew I wouldn’t do an all over pattern on the table because it is such a large table but I knew I wanted a mirror effect from one side to the other. So I cut out my stencils in 5 sizes so that I had some variety. I used 5.5″, 5″, 4.5″, 4″ and 3″.

I laid out my stencils as I went to figure out the pattern I wanted. I used a 1″ foam brush to apply the paint and used a daubing technique to get in all the holes on the stencil. This definitely requires patience! It helps that I am a perfectionist so this tedious step was right up my alley.
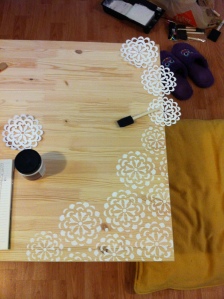
Yes that is a glass of wine in the photo on the floor. 😉 I often have a glass of wine while I am crafting! You can see I used alot of stencils. Even though I used the heaviest card stock I have I still found I needed to cut new stencils often. The paint got caked on the stencils pretty thick and it made it harder to use the stencil. I also made a map as I went (that’s what the notebook in the photo was for). I wanted to make sure I could mirror the exact pattern on the opposite side of the table. Tip: use only white paper for the stencils when applying the paint. I used the red ones just for placement value of the pattern.

Step 3
Take your table outside or into a garage if you have one, to start the staining process. You need good ventilation for staining. First you will need to apply a coat of the pre-stain treatment (red can). Read the can for proper directions. If I remember correctly – apply with foam brush, wipe lightly with cotton cloth and let it dry for about 15-20 mins.
Step 4

Apply the stain. I did 3 coats and stopped because I was happy with the look. You many want it darker, it will all depend on the colour stain you buy and the look you want. I used a 2″ foam brush to apply the stain. I would do one whole coat and then go back to the beginning and start to wipe the stain with the cotton cloth. The photo on the left was taken after I had applied the first coat. The photo on the right is after the first coat had dried. I took these photos to show how different it looks after it dries. This is why you need more than one coat.
Step 5
Last step will be to apply a few coats of polyurethane or varathane. This helps to seal the stain and protect the wood. I knew this desk would be used daily so I wanted to make sure it was well protected. I applied 4 coats to the top. Between each coat you will need to do a very light sanding to make it smooth. And I mean LIGHT sand, a very gentle swipe and that’s it. On the bottom of the table top and the legs I only did one coat because I knew they would be ok with less. I allowed the varathane to dry 24 hours between coats. (Not because you have to but because I had to due to my work schedule.)
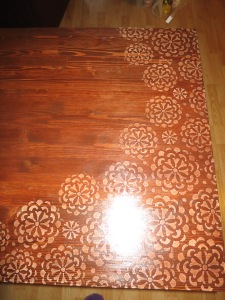
Here is a close up of the pattern:
I learned alot in this project! I thought I’d share a few of my trials and tribulations with this DIY…
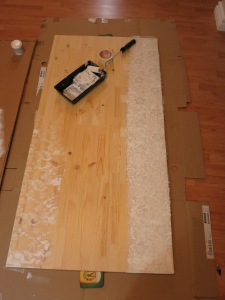
1. My original plan was to use a piece of lace and use a paint roller over top and have this beautiful lace pattern show up on the wood. Well it didn’t work at all! It looked awful. That was when Leanne came in and saved the day with her heavy duty sander and got rid of my mistake. Here is the evidence of my “craft fail”… it’s hard to see but I assure you it looked bad and nothing like lace! Leanne and I even tried using a spray can over the lace and that didn’t work either.
2. This is definitely easier to do if you have a garage! I do not have one, so I was propping up the table top on tupperware containers outside in my driveway to do the staining. This is okay as long as you have nice weather. I started this project at the end of summer into the beginning of fall. So this is what caused my biggest delay in getting this done. It also didn’t help that I got sick and it rained for a few weeks. I finally took the table over to my grandparents and used my Grandad’s garage.
3. I wish I could have found a good second hand table like the one that had inspired this DIY but alas I couldn’t. I ended up having to wait about a month to get the pine legs from Ikea because they didn’t have them in stock! Just another delay in this project. By this point I was so frustrated, I gave in to the fact that this table was going to be the longest DIY I had done yet.
I may have had alot of set backs with this project but in the end I am very happy with the outcome. I love my desk! And I can proudly say it is an original. 🙂
~Made beautifully by Heather~