Paper clip book marks

20121212-003334.jpg

These bookmarks were made using various sizes of paper clips and ribbons and beads.

I cut ribbons about 4-6 inches in length and tied them around the top of each paper clip and trimmed the ends to suit the length I wanted.

These little guys get clipped to the page you finish reading and the ribbons and beads hang out the top.

I liked this craft because it could be gifted to boys or girls. Anyone that reads would like this as a cute gift.

You could even get kids involved by having them help pick the ribbons and clips they want, have them string the beads and assemble these themselves.

20121212-003757.jpg

20121212-003824.jpg

Knitted Dish Cloth

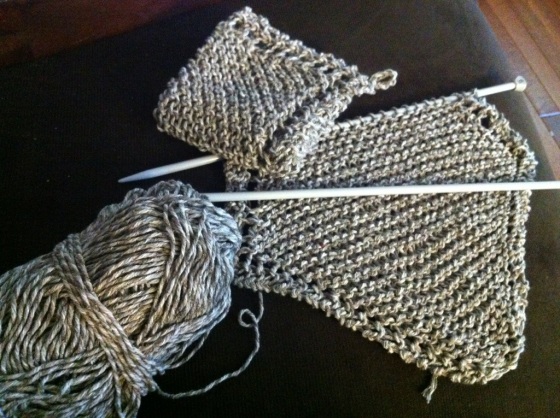
Knit dish cloths are always in demand and I have had several people ask me to make them some. If you know some basic knitting techniques, this whips up very quickly.

I got this great pattern from my very crafty and handy mother-in-law. She has been making these for years and I was fortunate enough to get this pattern and a tutorial from her two years ago. Now when I do one, I have the pattern memorized because it’s that simple.

Use one skein of any cotton yarn.
Needles: 1 pair 6.0 mm (US 10 / UK 4)

Instructions:

Cast on 4 sts.
Row 1: K across
Row 2: K2, yo, K to end of row
Repeat row 2 until there are 43 sts on needle
Next decrease rows: K1, K 2 tog, yo, K 2 tog, K to end
Continue to decrease rows until there are 4 sts remaining on the needle
Cast off remaining sts.

Abbreviations:
K – knit
sts – stitches
tog – together
yo – yarn over

20121012-150552.jpg

Made beautifully by Leanne

T-Shirt Shag Rug

In my many hours of searching projects on Pinterest and Craftgawker I have come across 2 tutorials that inspired this next project….

Shag Pillow Tutorialย andย No Sew Shag Rug

What I’ve done is combined the 2 of these DIYs and made my own project! I love the look of the “shag” and have wanted to do a project involving “shag” for awhile now. I love the pillow tutorial but was more excited by having a shag rug. The pillow is cute – but I got to thinking about how practical it would be and it is definitely more about the look. All I could think about was lying down on the couch, falling asleep with your head on the shag pillow and waking up with a crazy amount of lines on your face! I know that probably sounds completely ridiculous but these are the things that go through my head. ๐Ÿ˜›

So when I came across the rug tutorial I knew it was for me! While I liked the idea of not having to sew I actually preferred to sew the rug. For a few reasons…a major one being it would be much easier to through in the washer. I worried that with the no sew idea the pieces of cotton would just fall out in the washing machine and you’d be putting it back together every time you clean it. Plus I am really loving sewing right now and learning more about the machine I got from my gramdmother. So I knew sewing it was for me! The longest part of the process is cutting the t-shirts up into strips for sewing. I honestly think sewing the strips would be faster than cutting all those tiny holes into the t-shirt base and then threading each piece through. Best part of this project – its all up-cycling! I didn’t buy anything for this project! So of course I am in love with it. At the beginning of the summer I went through all my old clothes and had a huge pile to give away. Then it dawned on me that I’d seen some projects online that up-cycles old t-shirts, so I put all my shirts aside (that weren’t too ratty) and saved them for a future project. After I had already started cutting the strips for this rug my mom was going through all my brother’s old clothes and had a huge bag of all his old t-shirts to give away. So I quickly snagged those up and have them on hand to make another rug soon! ๐Ÿ™‚

As you can see I am very excited about this DIY! Here is my tutorial:

Materials Needed:

  • rotary cutter
  • ruler
  • quilting board
  • sewing machine
  • white thread
  • 8-10 t-shirts (depends on the size of rug you want and if you are using men’s or women’s shirts)

Here is what I started with….I later added a black t-shirt as well.

Step 1: Cut the t-shirts into strips of 1.5″ wide. Then cut the strips into lengths of anywhere from 4″-5.5″. I know it seems like a big gap in size BUT it really isn’t. This is a great project because it does not have to be perfect in any way possible. Like the blogger in the shag pillow tutorial said – “this is a very forgiving project!”ย I can’t remember how many shirts I cut up….9 or 10. But I didn’t end up using all the cotton. Once I started to run out of some colours I spaced out my colouring a bit more and eventually stopped when I had run out of all the pink shades.

Step 2: Then take an x-large or large mens t-shirt and cut off the arms and neck. Cut it in half. You’ll end up with 2 rectangles.

Step 3: Sew the two pieces together along one of the long edges. (I originally did this thinking I had enough strips to make a massive rug but when I started to run out of some colours I knew it wouldn’t be as big as I had hoped.)
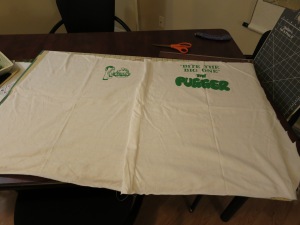
Step 4: Next I took my ruler and drew lines 1″ apart on the t-shirt base. Some of you may not feel the need to do this, especially if you are good with a sewing machine. But since I am still learning and not very good at sewing a straight line I felt more comfortable having the lines as a guide.

Step 5: Start sewing on your strips of cotton! There really is no rhyme or reason to this part…I didn’t follow any kind of pattern. It was completely random. I just bunched them up a bit while sewing them on.

Step 6: To start the next row, fold the strips from the first row over and start sewing again. Repeat over and over. Sew until you run out of strips or some colours…like I did.
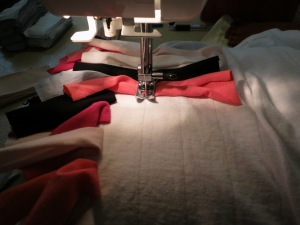
At the end I had alot more of the bottom white t-shirt left that I could have sewn strips on. So I folded it over and sewed it to the edge of the other side. I trimmed the edges of the bottom so that none of it was showing on top and that was it!

Viola, DIY shag rug!


I also recommend buying a non-slip rug base. It’s looks like a rubber mesh thing – you can buy it at the dollar store and cut it to the size of the rug. Comes in handy, especially on slippery wood floors like I have!

It is a very simple and fun project. I really enjoyed doing it and will definitely make another one. I hope this inspires your next sewing project!

~Made beautifully by Heather~

{Kids} Pillowcase Floor Mattress


This has to be one of the easiest DIY craft I have ever ย done! We have all seen different variations of this project online. So here is mine to add to the mix! I hope you’re ready for how easy this is….

1.) I bought the pillow cases on clearance from Zellers for $2 or $3 – I did my best to find 2 patterns that complimented each other. I though this gingham and and floral combo worked well together.
2.) Then I bought the cheapest pillows I could find at Wal Mart (the “whale” pillow – $4).
3.) I pinned the seams of two cases together and sewed along the edge (using a straight stitch) as closely as I could. I opened up the 2 I sewed together first and pinned the 3rd case to the floral one (because I wanted it in the middle) and did the same thing again.
4.) Then I stuffed the pillows in the cases and viola! You have a pillowcase floor mattress!

I left the openings open on purpose – much easier to clean. I thought about sewing them closed but I made this for my fabulous niece Abby and seeing as she is a busy 3 year old I knew Leanne would appreciate being able to clean it easily! My mom had a great idea though – you could sew velcro to the openings if you are worried about the pillows falling out. I didn’t worry about it because I was too anxious to give it to Abby! But it is an idea that I will use next time. The pillows also fit super snug so that made it easier to justify not sewing in velcro. Abby loved her floor mattress and so does her baby sister Charlotte! ๐Ÿ™‚ I think I need to make another so they each have their own!

Side Note: There is no turning the cases inside out to avoid having exposed seams. (I made this mistake thinking it would work and DOH! it didn’t) Not my smartest moment. So I had to rip out all my hardwork – a total of about 10 mins of work ๐Ÿ˜› – and sewed it again. Just have the seams face the floor when you lay it out, no one will be any wiser! It will be our little secret.

And I use brackets on {kids} because I’m adult enough to admit I would like one for myself! haha. Sew two more cases to it and you could easily have a pillowcase mattress for yourself! Happy sewing friends! ~H.

Crocheted Owl

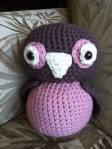
I love to crochet! And one of my favourite things to make is amigurumi animals. I have made alot over the past few years. Especially since my lovely cousin Leanne started having kids and giving me a reason to make these fun creatures for my amazing nieces! This owl is by far one of the easiest animals I have ever made. It crochets up real quick and is nice and fluffy. It also helps that I LOVE owls! Don’t let the pictures deceive you, the owl is about 6-7 inches tall and about 3-4 wide. He’s a nice little plump fella! As you can see I made a few different variations of the pattern. Get creative! It doesn’t have to be all one colour, I think its more fun when its multi-coloured. I plan on making more soon, there are so many possibilities! The snap eyes I bought in the states at Jo-Ann’s. I’m sure you can find them online. Sadly I can’t find them at any stores in Canada. Lucky the border isn’t very far for me. If you can’t find the eyes just stitch some on with black wool. I’ve done that many times with other animals I have made. You can find the pattern on amigurumipatterns.net. They have an awesome selection of free patterns! I’ve gotten quite a few great patterns on there. You will see me link to them more than once! Click on the .pdf link below or copy and paste the link into your address box. Have fun with it! ๐Ÿ™‚ ~H.

WT1742.pdf

Click to access WT1742.pdf